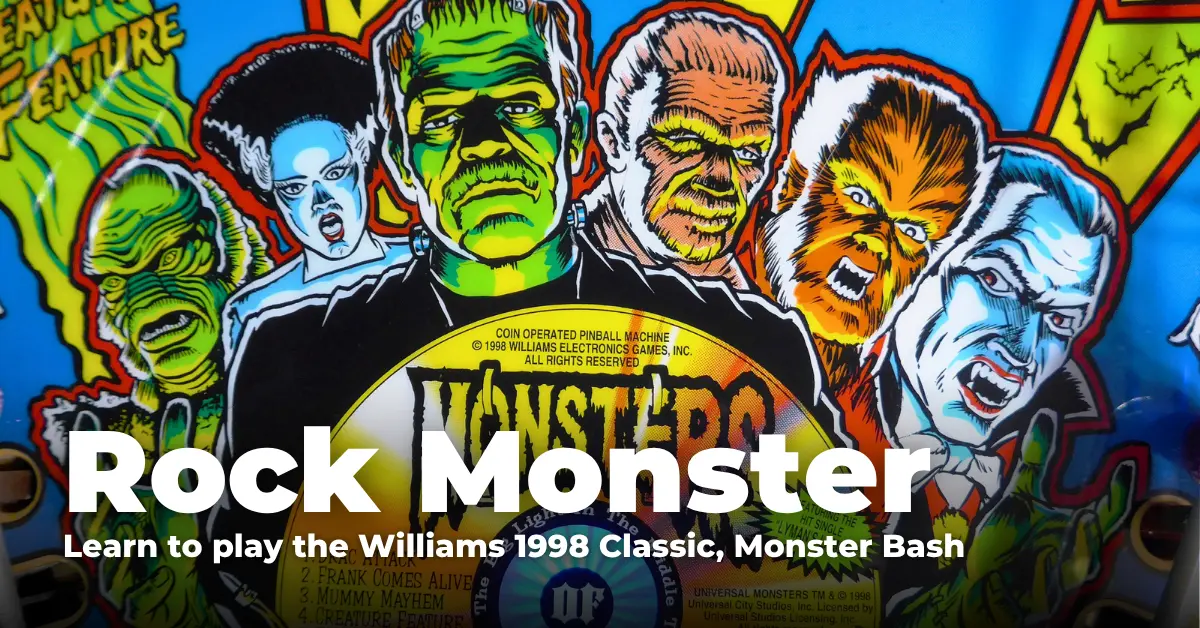
Rise to the Challenge: Learn How to Play Jersey Jack’s Avatar: Battle for Pandora Pinball


Released at the tail end of 2024 by Jersey Jack Pinball, Avatar: The Battle for Pandora is Mark Seiden’s debut as a pinball designer and features one of the most packed playfields the company has ever released, bringing with it a theme that might be tough to get into thanks to the unique terminology used throughout it. With code by Keith Johnson and the rest of the Jersey Jack team, the rules seem to be just as complex as the layout is!
More than any other machine in the past few years besides maybe The Godfather, JJP’s Avatar demands that players pay attention to the ruleset to maximize scoring and it has a very steep learning curve to boot. It certainly took me a bit of time to figure out the ideal ways to consistently do well on this game but I hope with the help of this guide, I can simplify the game a little to ensure that people reading it will be able to understand the basics and devise strategies of their own.
About Avatar: Battle for Pandora
Explore the alien landscape of Pandora and take down the RDA foundation, responsible for taking away its natural resources. Based on the first two Avatar films directed by James Cameron.
- Manufacturer: Jersey Jack Pinball
- Year: 2024
- Design: Mark Seiden
- Code: Keith Johnson, Taylor Snyder, Jason Allen
- Art: Lea Faske
- Displays: Jean-Paul de Win, Mark Molitor, Olaf Gremie
- Music: Stemage
- Mechanical Engineering: Rachael Freriks, Dan Molter, Nick Jensen, Ernesto Velazquez, Dan Lachcik
- Electrical Engineering: Tony Tumminaro, Luna Silverfang, Eric Miller
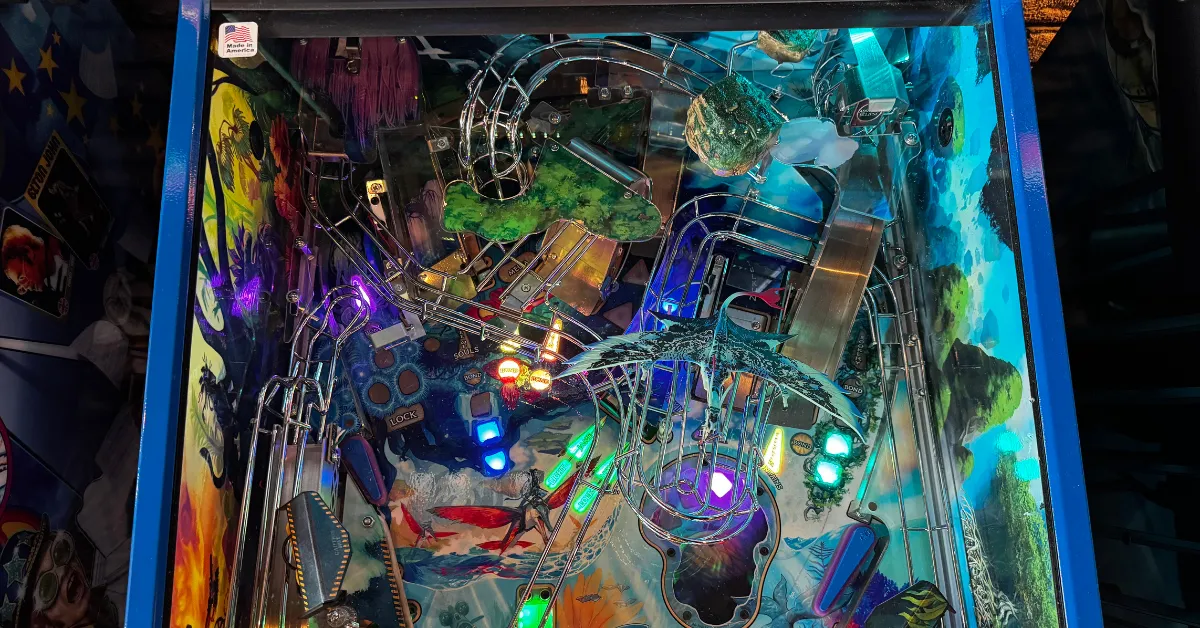
Playfield Overview
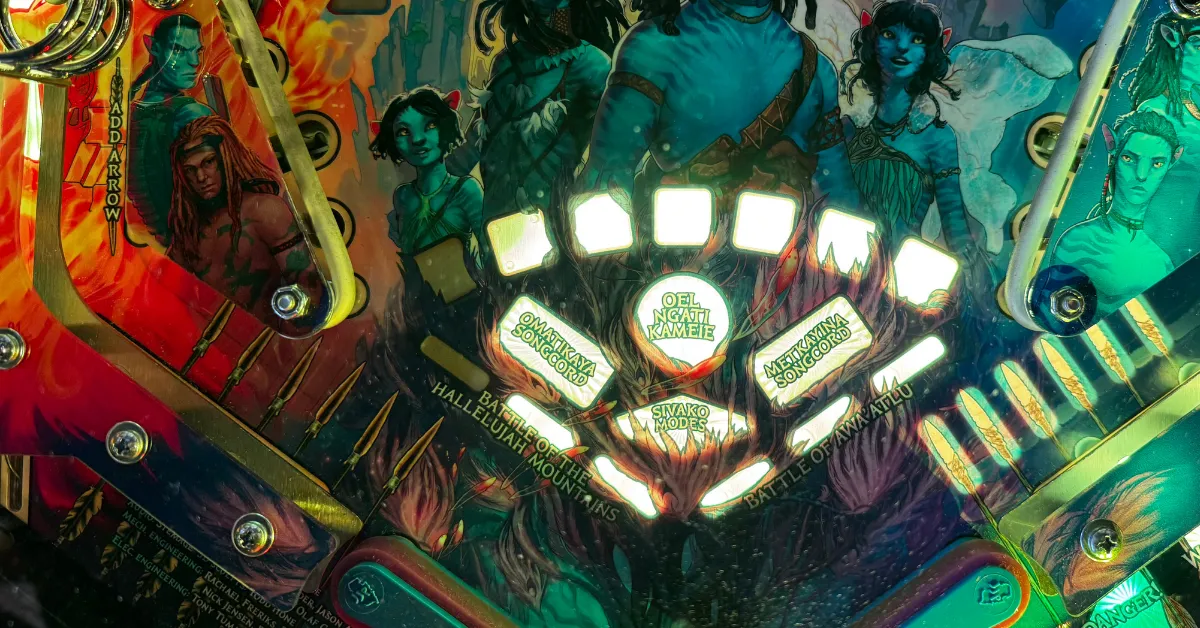
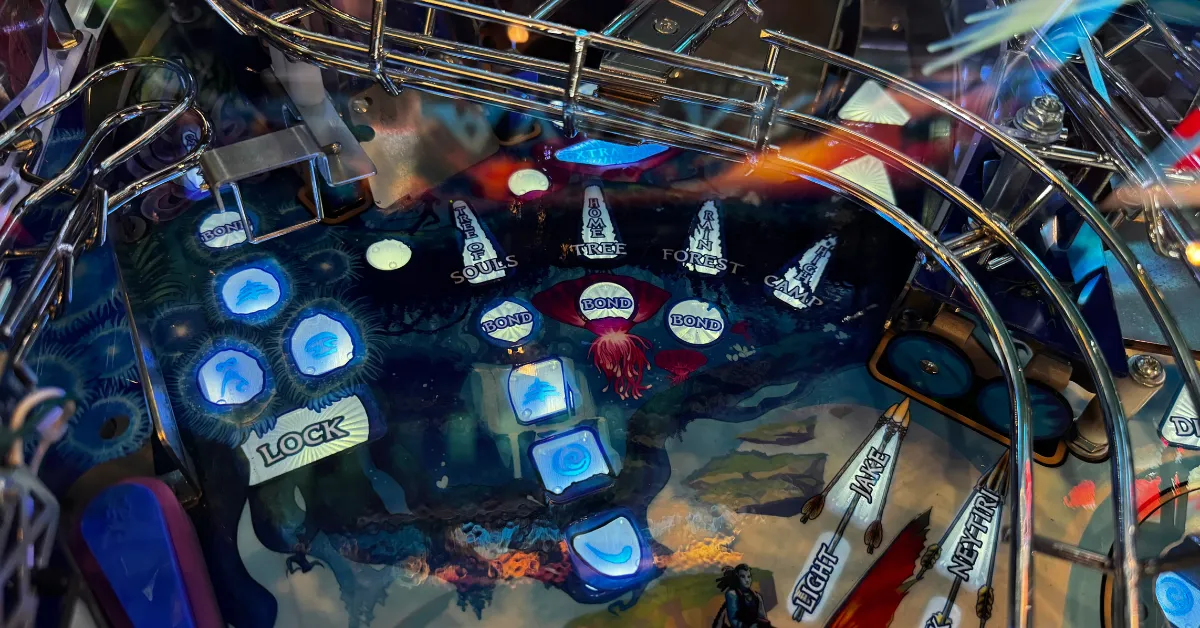
Talk about a packed layout; there are 10 unique ramps and orbits on JJP’s Avatar and this isn’t even accounting for the targets and shots in between them! Farthest to the left of the playfield is a single standup target for Spider, and a short ramp (labelled RDA) that feeds the upper left flipper for follow up shots. Said upper left flipper gates the entrance to the Omatikaya left orbit, which is where new balls also enter the playfield if plunged at maximum strength and can result in balls either entering the ball lock or the home tree VUK if the shot to the orbit was too weak. Located directly below the upper left flipper is a slingshot that awards the AMP Suit token if made as a combo from the upper right flipper, and the scoop which starts Songcord modes when available.
The left ramp is the tree of souls ramp (gated by two targets that light mystery) and can be hit from either lower flipper or rarely as a reflex flip off of the upper right flipper, but my preferred way of hitting it is by shooting it as a backhand from the left flipper. The home tree VUK is located to the right of this ramp, and sends balls at high speed to the upper right flipper for follow up shots & cashes out the meuia that has been earned if available. Two more shots are located in close proximity; the rainforest loopback ramp, which can be hit from either left flipper, and the high camp mini-loop, which awards substantial amounts of meuia when hit but is a tight shot that requires a late flip from the upper left flipper. The entrance to the mini-loop is gated in the front by two standup targets labelled Jake / Neytiri, which light the multiball lock at the orbits when completed.
Also located behind the center standup targets is the toughest shot on the game, which serves two purposes: it can serve as a mini-loop hit from either direction (the upper flipper side is called the Metkayina loop), or it can serve as a jump ramp called the Tulkun shot which requires a very precise flip from the upper right flipper. When the jump ramp is raised, the ball can alternatively be shot under the jump ramp (Dive shot) to access the lower playfields. The Tulkun shot takes a lot of practice to make consistently but starts a lucrative mode if you can hit it three times!
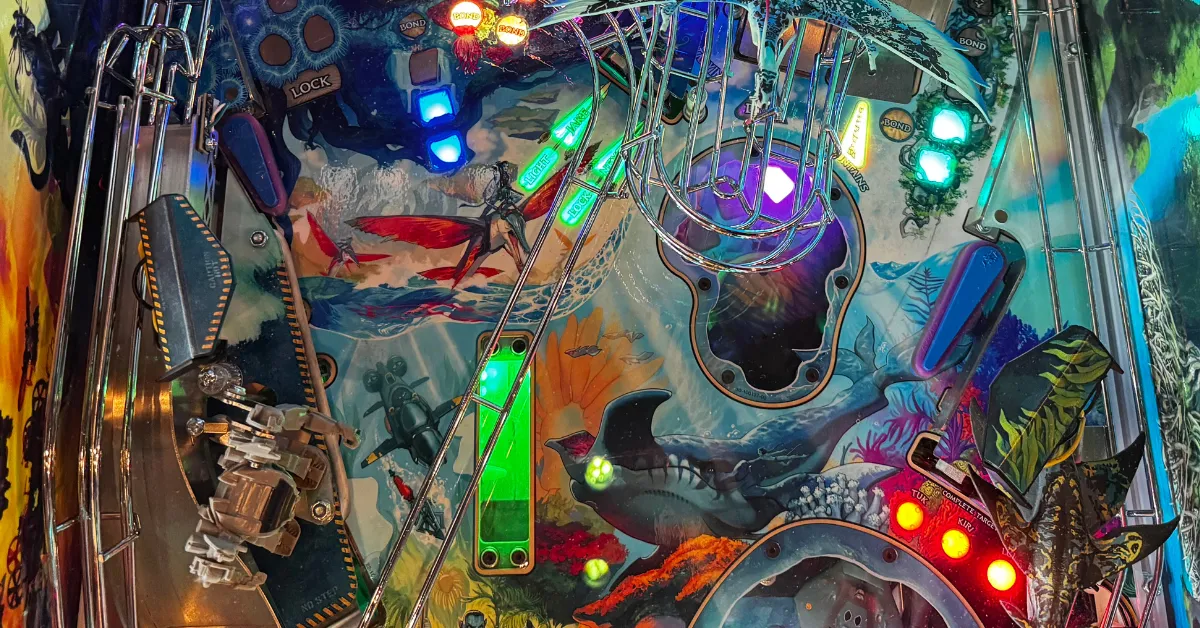
The right side of the playfield is occupied by the large Hallelujah Mountain ramp which has a spinner at its apex and scores the eclipse jackpot when lit (during the eclipse mode); and the right orbit, a tight orbit shot compared to its left orbit counterpart that feeds the upper left flipper at a fast speed. On the very far right of the playfield are four targets, each labeled after the kids; completing these targets lights a lane award that can be cycled between inlanes and outlanes by using the flippers.
Three additional features are located below the playfield and correlate to the game’s two multiball modes. The infinity mirror ball lock is accessed by locking balls at the orbits (after hitting the center targets to light lock), and releases balls via the scoop. There are also two lower playfields; one contains a bumper and four standup targets, and the other is more involved with two mini-flippers, a target bank, and an orbit that wraps around the targets. Defeating the crab suit on this lower playfield, or locking 3 balls at the infinity mirror, will start a multiball.
Scoring on Avatar: The Battle for Pandora is average for this era of Jersey Jack releases, about on par with Elton John where the best scores would often surpass 300M or 400M in tournaments, but scores of over a billion are quite possible if you can master the game’s difficult layout!
Getting Started with Avatar: The Battle for Pandora
- During any mode or multiball, after hitting a flashing shot, mash the action button until your arrows have maxed out. This will help maintain your playfield multiplier – and it can increase up to 4x!
- Choose a skill shot at the start of each ball and after locking each ball. Use the action button to select a super skill shot. Plunge carefully!
- Shoot any shot three times to start a Sivako mode, then shoot the flashing shots to complete them. If the mode has been completed, further shots to the corresponding mode starter will award percentages of the mode total and bonus meuia.
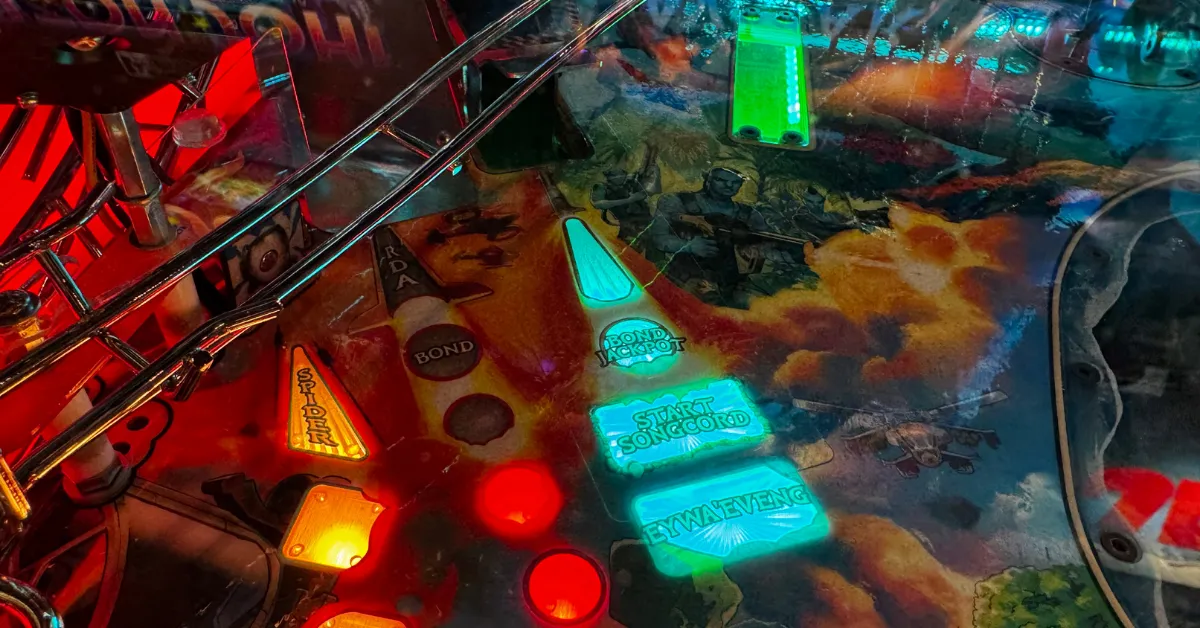
- The rainbow arrows advance towards Songcord modes, started at the scoop when lit. Spot Songcord tokens by either hitting the rainbow shots, or cash in your arrows (earned from the inlanes) to spot the next one, by pressing the action button when flashing purple / orange. Hit the red shots to complete each Songcord mode.
- Start multiball by locking balls at the orbits after completing the center targets (Battle of the Hallelujah Mountains), or by shooting the jump ramp and then sending the ball under it to complete the targets and then defeat the crab suit (Battle of Awa’Atlu). Shoot the red shots for jackpots or keep increasing the jackpot value to qualify add-a-balls earned with the next jackpot scored.
- Earn meuia by making shots around the playfield, then cash it out at the home tree VUK. Different awards are given as the player accumulates meuia.
- Eclipse will start after enough switch hits have been made. While eclipse is running, all scored points will be added into the eclipse jackpot that can be scored at the right ramp.
- Complete the kid targets on the right to light a lane award. The left and right outlane lane awards can help you save your ball, and the inlane awards help maintain your arrows / playfield multipliers.
- Complete a combo at all 8 shots with pink inserts to qualify the bond combo jackpot. Shoot any combo shot followed by the scoop to cash it out.
- Every time a mode is completed, a PANDORA letter is earned, and completing it will light the scoop for Eywa’Eveng (Pandora) wizard mode. Extra ball is lit at the home tree VUK after the first three letters have been scored.
Arrows / Playfield Multipliers
Nope, we’re not talking about blinking shot arrows here! As inheritors of their environment, the Na’vi needed to learn how to use arrows to fend off their enemies, and maintaining your arrows plays an important role in getting the best possible scores on this machine. If you read any section of the instructions, read this and keep this information in mind as you read the rest of the guide.
Every time a mode or multiball is running and you hit a lit shot, take a second to notice the lights on your inlanes near the flippers. Those yellow inserts are the arrows you have accumulated – you can prepare them by rolling through the inlanes when a mode isn’t running. Whenever you hit a lit shot, be prepared to mash the action button to replenish your arrows; you’ll know you’re safe when the arrow meter on either side is full again.
Why maintain your arrows? Simply put, the arrows correspond to the playfield multiplier, and every time your arrows are depleted it will lower down by 1/4th of what it was before. The multiplier maxes at 4x!
Remember, if you want to make maintaining your arrows less of a pain, try completing the right targets to light a lane award, and then roll through the left inlane to maximize the multiplier at 4x, or the right inlane to earn unlimited arrows for the rest of the currently active mode.
Skill Shots
There are many different skill shots available on this machine. All of them are available at the start of each ball by default, but one light will be lit for a super skill shot that can be changed by pressing the action button to move it around. Skill shots will help you earn more meuia for the rest of the ball, or award bonuses if they were made as super skill shots.
My favorite super skill shots are the ones into the infinity mirror ball lock (which locks 1 ball towards Battle of the Hallelujah Mountains), the home tree VUK (lights mystery), and the rainforest loopback ramp (which spots 3 bond combos). There’s also a really cool one involving a rebound off the AMP suit slingshot into the center targets that increases scoring during the above-mentioned multiball, but I suggest getting used to your local copy to see if this skill shot can be consistently made.
Sivako Modes
Sivako is Na’vi for “rise to the challenge” and these modes are the best starting point for people new to the machine who want to get some experience with the layout, but are worth playing as they can score substantial amounts of points when completed. To start a sivako mode, just hit any shot with three inserts in front of it, 3 times.
Every mode awards points for each lit shot and a large time bonus based on the seconds that were remaining when the mode was completed, and these scores are added into the eclipse jackpot if eclipse is running. PANDORA letters are also earned with each completed mode.
There are eight sivako modes in total, started at the shots listed in parentheses:
- Spider (left standup target): Low-scoring mode. Hit the flashing ramps / home tree VUK to resist the RDA’s control, you can’t hit the same shot more than once until another is made. The mode ends in success if the player has lasted 30 seconds.
- RDA (left mini-ramp): Hit the home tree VUK and rainforest loopback ramp to mine for resources. The Tulkun shot (jump ramp) scores 2x resources. Mode ends after five resources have been mined.
- Omatikaya (left orbit): Hit the red shot to hunt the Sturmbeest. The shot moves from left to right and back over periods of 10 seconds. Hit two flashing red shots to complete.
- Tree of Souls (left ramp): Woodsprite frenzy – hit every switch to collect 250 woodsprites before time runs out. This is a great mode that practically completes itself if stacked with a multiball.
- Metkayina (upper right mini-loop): Hit any ramp shot then combo into the dive shot (raised scoop ramp). The same shot cannot be used to set up more than one combo. Two combos to complete the mode.
- Tulkun (jump ramp): Best of the eight modes but toughest to start. All shots build up a jackpot scored at the jump ramp which was used to start the mode and flashing shots add 2x their value to the jackpot. Mode ends once the jackpot is scored.
- Dive (lowered scoop ramp / dive shot): Shoot the dive shot to collect 30 bumper hits in 30 seconds. Simple enough, but low scoring and prevents progress on Battle of Awa’Atlu multiball from being made for the duration.
- Rookery (right orbit): Keep the ball flying by shooting ramp shots and the home tree VUK. Complete the route on the display to finish, which usually takes about four or five airborne shots.
My priority list for Sivako modes from best to worst: Tree of Souls > Tulkun > Omatikaya > RDA > Rookery > Metkayina > Spider > Dive.Songcord ModesSongcords have the steepest learning curve of the game, so I won’t go into too much detail about them here, only gloss over the basics. In the movies, songcords are essentially necklaces worn by the Na’vi that tell their life stories, so as you’re shooting rainbow shots to collect songcord tokens, you’re creating your own songcord.If you wind up hitting a rainbow shot corresponding to a token that you don’t want, hold the action button to discard it. You can also use the action button to spot the next songcord token if enough arrows have been accumulated; simply press the action button in this case.
Each songcord mode awards a PANDORA letter once completed. There are 22 songcord modes, way more than I have time to go into in this guide, but I’ll list my three preferred modes from each songcord type (Omatikaya and Metkayina) for the sake of this guide. These top 3 consider how high the scores during them are, and their overall difficulty. The listed songcord tokens are in parentheses.
Omatikaya Songcord:
- Viperwolves (loopback ramp, center targets): Hit orange shots to fend off the wolves and increase the “burn bonus” (10k per second + 10k per shot made). Then make the shots you didn’t hit during the first phase to complete.
- Blue Flute Clan (left orbit, left ramp, VUK, loopback ramp, center targets): Alternate between the left and right lit shots on the playfield. The same shot cannot be hit more than once in a row.
- Jake’s Training (left orbit, loopback ramp, high camp loop, center targets, right ramp): Hit flashing targets, ramps, or orbits in succession to complete the mode. Higher scores for every phase completed.
Metkayina Songcord:
- Maglev Raid (left mini-ramp, left orbit, loopback ramp, center targets, right targets): Shoot the left and right ramps to hijack the Maglev. Complete the required ramp shots to light a count-up award at the rainforest ramp.
- High Value Prisoners (spider target, left mini-ramp, AMP suit, high camp loop, center targets, right targets): Hit the center targets and the far right kid target, then make 8 shots to all flashing lanes to complete.
- Uturu (left orbit, center targets, upper mini-loop, right orbit, right targets): Hit the orbits, then ramp shots. This is a very long mode with a lot of shots to make and the same one cannot be made more than once in a row.
Multiball Modes (Battle of the Hallelujah Mountains & Battle of Awa’Atlu)
Though both multiball modes are started in different ways, they share the same jackpot rules, so I figured I’d list them both here.
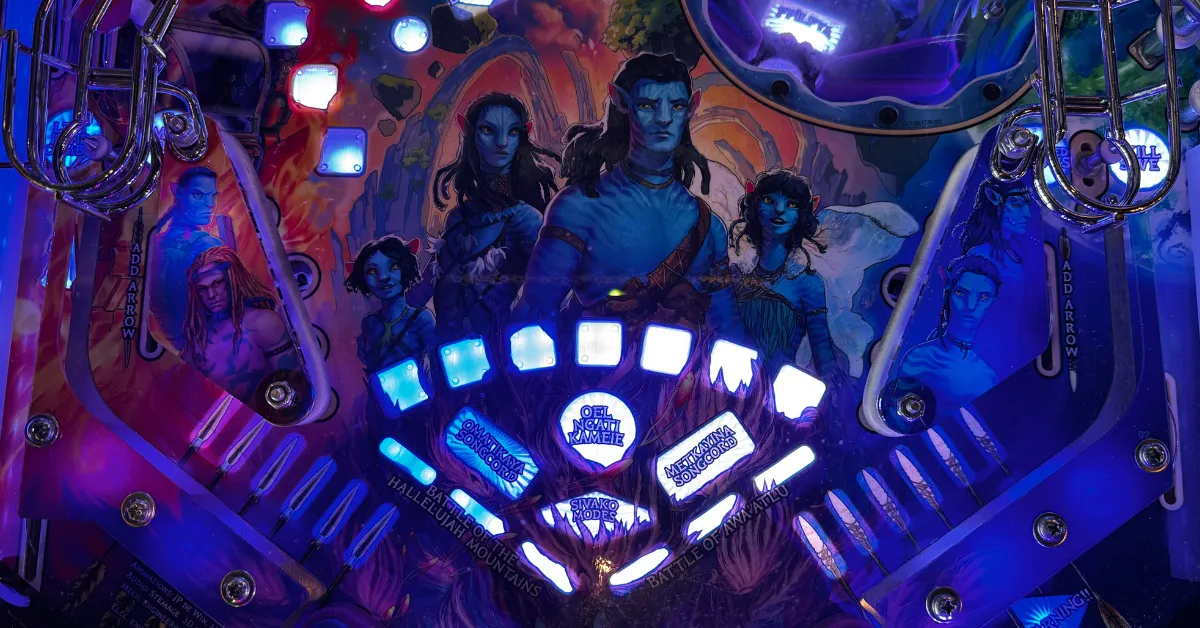
Battle of the Hallelujah Mountains is started by locking 3 balls in the infinity mirror by completing the center targets, then shooting any lit green orbit to send the ball down there. Later attempts require specific orbits to be hit to lock the ball, and only one lock can be lit at a time.
Battle of Awa’Atlu is started by making the dive shot, located until the right scoop which raises as the loop above it is made. After completing the targets on the lower playfield which cycle with the flippers, take down the crab suit by using the mini-flippers. Subsequent attempts require more and more shots to take down the crab suit.
Both multiballs share the same jackpot rules despite having different display animations. All shots are lit to score awards and light a red jackpot shot in the order described below, and every 10 “award” shots hit qualifies an add-a-ball with the next jackpot scored. The jackpot sequence is as follows: center targets, loopback ramp, scoop, VUK, spider target.
Once 5 jackpots have been scored (across multiple attempts if necessary), the RDA mini-ramp will be lit to score the super jackpot and complete the multiball, enabling victory laps for the rest of the mode if this was the third attempt and awarding a PANDORA letter.
Meuia Awards
Meuia points serve as the Na’vi honor system. Every time a shot is made over the course of the ball, +1 Meuia is added, but the number can increase if skill shots are made, and meuia can increase by +5 by hitting the high camp loop, or hitting a shot that started a completed Sivako mode three times.
Meuia is cashed out at the home tree VUK when lit and the insert has different colors for each award. In order, the awards are: bonus X, songcord token, 1M, +1 tilt warning, collect bonus, advance PANDORA, light extra ball, start eclipse.
Eclipse
Eclipse mode starts as soon as enough switch hits have been accumulated, over the course of multiple balls if necessary. Once “first contact” has been reached on the display, you know you’ll be close to eclipse starting up, so prepare to start any multiballs or modes you want to during this time!
As soon as eclipse starts, the playfield lighting will drastically change to represent the change in atmosphere on Pandora, and the right ramp will be lit to score the eclipse jackpot for as long as the mode is running. The eclipse jackpot takes into consideration the scores during all modes that were running alongside eclipse, and as soon as the jackpot is scored, its value will reset. Unfortunately, you’ll also lose the value if you fail to hit the ramp before the eclipse ends (when enough switches have been hit).
Once per eclipse, scoring an eclipse jackpot will award a PANDORA letter.
Lane Awards
Lane awards are lit by completing the “kid” targets on the far right of the playfield and can help in keeping the game going, or maximizing the playfield multiplier given from collecting arrows at the inlanes. When a lane award is lit, use the flippers to cycle it between the inlanes and outlanes.
From left to right, the awards are:
- Left Hand Combo: Hit as many shots as you can using only the left flipper. Each shot scores increasing amounts of points but it ends as soon as the right flipper is pressed or the ball drains. This also counts as a kickback, even if kickback isn’t lit.
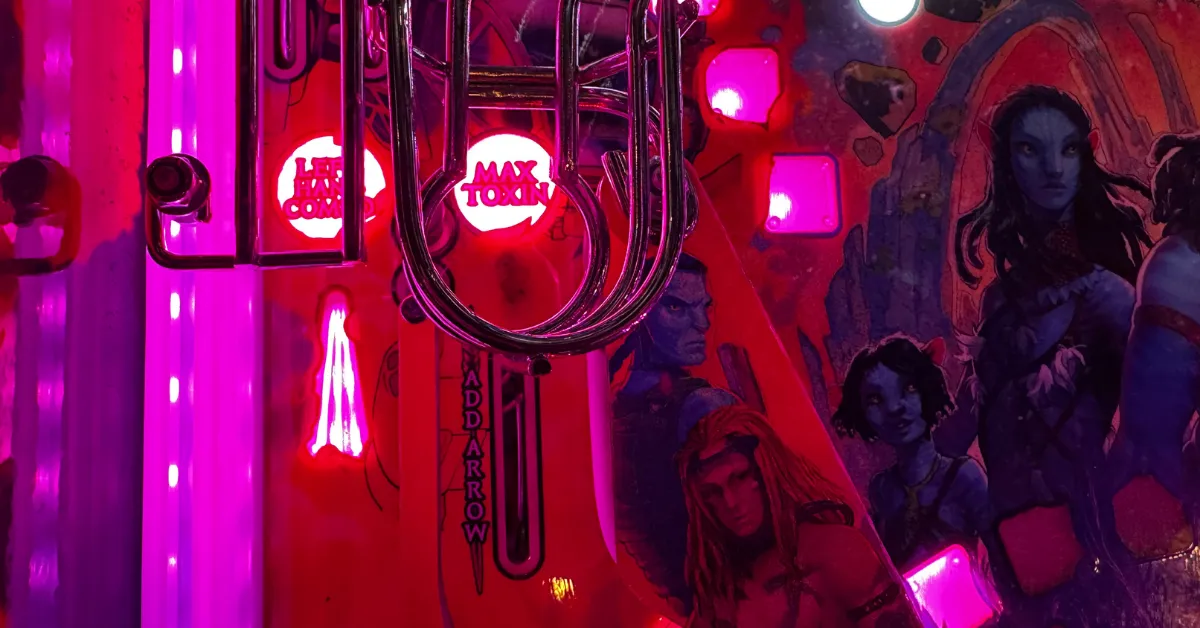
- Max Toxin: Maxes out the playfield multiplier at 4x for the next mode started, though you’ll still need to maintain your arrows by mashing the action button.
- Unlimited Arrows: For the next mode, you no longer deal with having to mashing the action button to recover arrows; you’ll maintain your current multiplier for the entirety of the mode.
- Skill Save: Sends a new ball to the plunger. Hit the random lit shot within 10 seconds to save your ball. Otherwise, the ball will end and the flippers will die.
Bond Combos & Bond Combo Jackpot
Eight of the orbits and ramps throughout the game can be lit to score bond combos named after one example of Pandoran wildlife (these are just for flavor text, don’t worry – no memorization needed). The list of combos you’ve collected can be seen at the top of the display.
Once all 8 shots have been used in a combo (it doesn’t have to be the same combo, they can be separate chains of shots), the bond combo jackpot can be collected at the scoop, but it must be lit as part of a combo before scoring it. Collecting this jackpot also awards a PANDORA letter.
Eywa’Eveng (Mini-Wizard Mode) & Milestones
All of the tasks described throughout this guide help collect PANDORA letters. Extra ball is lit at the home tree VUK once the first three letters have been scored, and as soon as PANDORA has been completed and a mode isn’t currently active, the scoop will start Eywa’Eveng.
During Eywa’Eveng, the goal is to re-spell PANDORA by completing sets of lit shots on the display, to score the super jackpot. This is a 3-ball multiball that is very tough to finish and tends to score around 100M if enough shots are made, but I haven’t scored the super jackpot… yet…
There are also milestones awarded by completing certain tasks throughout the game; I won’t spoil these, but you can view them in the status report and completing them will give access to the true wizard mode!
Noah’s Strategies
- With a massive ruleset like this, it can help to compartmentalize the rules into different sections. I view the rules in the following chunks: Sivako / songcord modes, multiballs, and eclipse, with everything else scoring points but not being worth diving deep into. This can help make deep rules feel like less of a pain to learn and I’ve used this strategy to help myself learn tables I once struggled with.
- There are many directions the ball can release from on this machine, so take time to get used to the layout and figure out its intricacies. The game will try to help you out the first time you hit the home tree VUK or drain down the left outlane by showing you the flipper you need to use; if you don’t use the flippers, SDTM drains are incredibly likely. They cannot be ignored if you’re playing this game for score.
- The scoop and tree of souls ramp shots, I find to be way easier from the left flipper than the right flipper, though your mileage may vary.
- I always prioritize the lock super skill shot at the start of each ball so I can get some progress towards Battle of the Hallelujah Mountains multiball, or bounce into the home tree VUK if the plunge was too strong.
- Sivako modes are the best course of action if you’re hoping to find a consistent source of points on this table. Find any shot that you can hit repeatedly (I like shooting for the RDA mini-ramp or tree of souls left ramp, personally), then start a multiball to maximize your scoring. Even better, when eclipse is about to start, play the mode out!
- A great way to handle shooting the right ramp for the eclipse jackpot is to shoot the scoop from either lower flipper, then dead bounce off the right flipper, and immediately hit the right ramp on the fly from the left flipper. This won’t always work but I’ve gotten surprisingly consistent results from doing this, more consistent than shooting the right ramp from a held flipper.
Like what you're reading?
Get pinball news, analysis, and deep dives delivered to your inbox.